The Mobile Route Planner brings the best of our mapping tools to the palm of your hand. Use it to plan your weekend gravel grinder, or take it with you on the go to find your way around town. Whatever the situation, the Mobile Route Planner lets you keep your plans flexible and make adjustments to your route on the fly.
Be sure to also check out QuickNav to learn how to get quick, easy directions made for you!
_____________________________________________________________________
Download the Ride with GPS mobile app
_____________________________________________________________________
Premium subscribers (and legacy Basic plans) have access to the Mobile Route Planner.
Create a Route
A route is a pre-determined plan for an activity. A route will include a track and an elevation profile, and can also include a cuesheet, points of interest, photos, and more. You can create your own routes or find routes that other users have created. Find out more about the difference between a Route and an Activity
The Mobile Route Planner is available with Premium (or a legacy Basic plan).
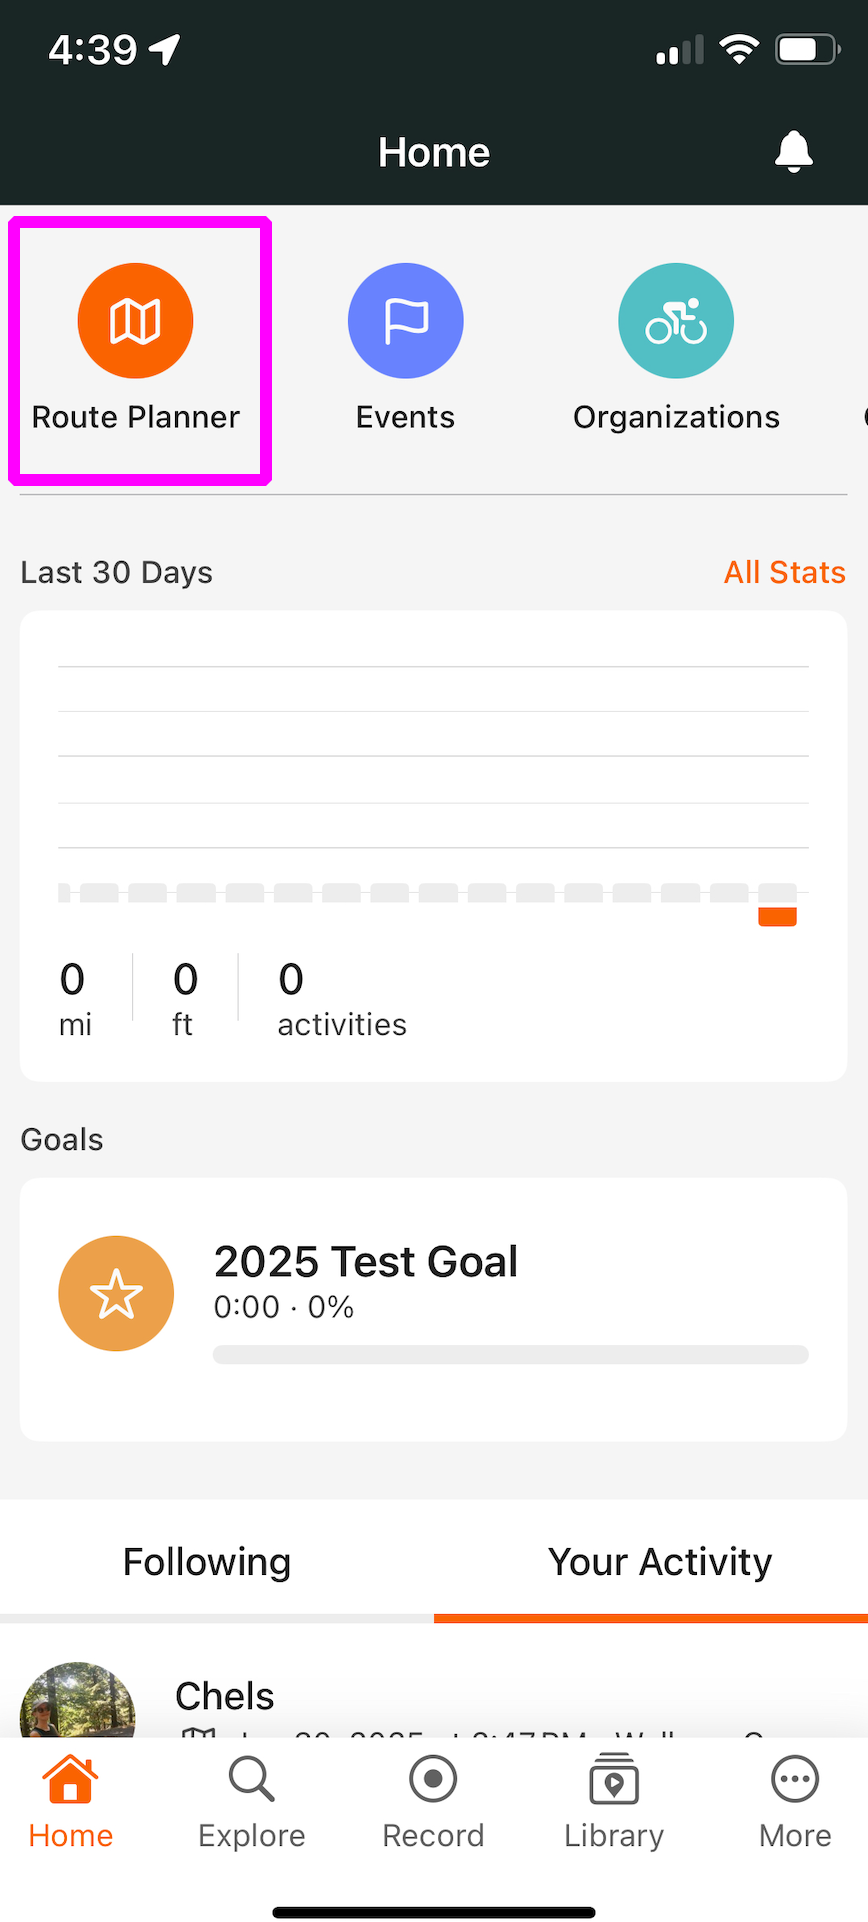
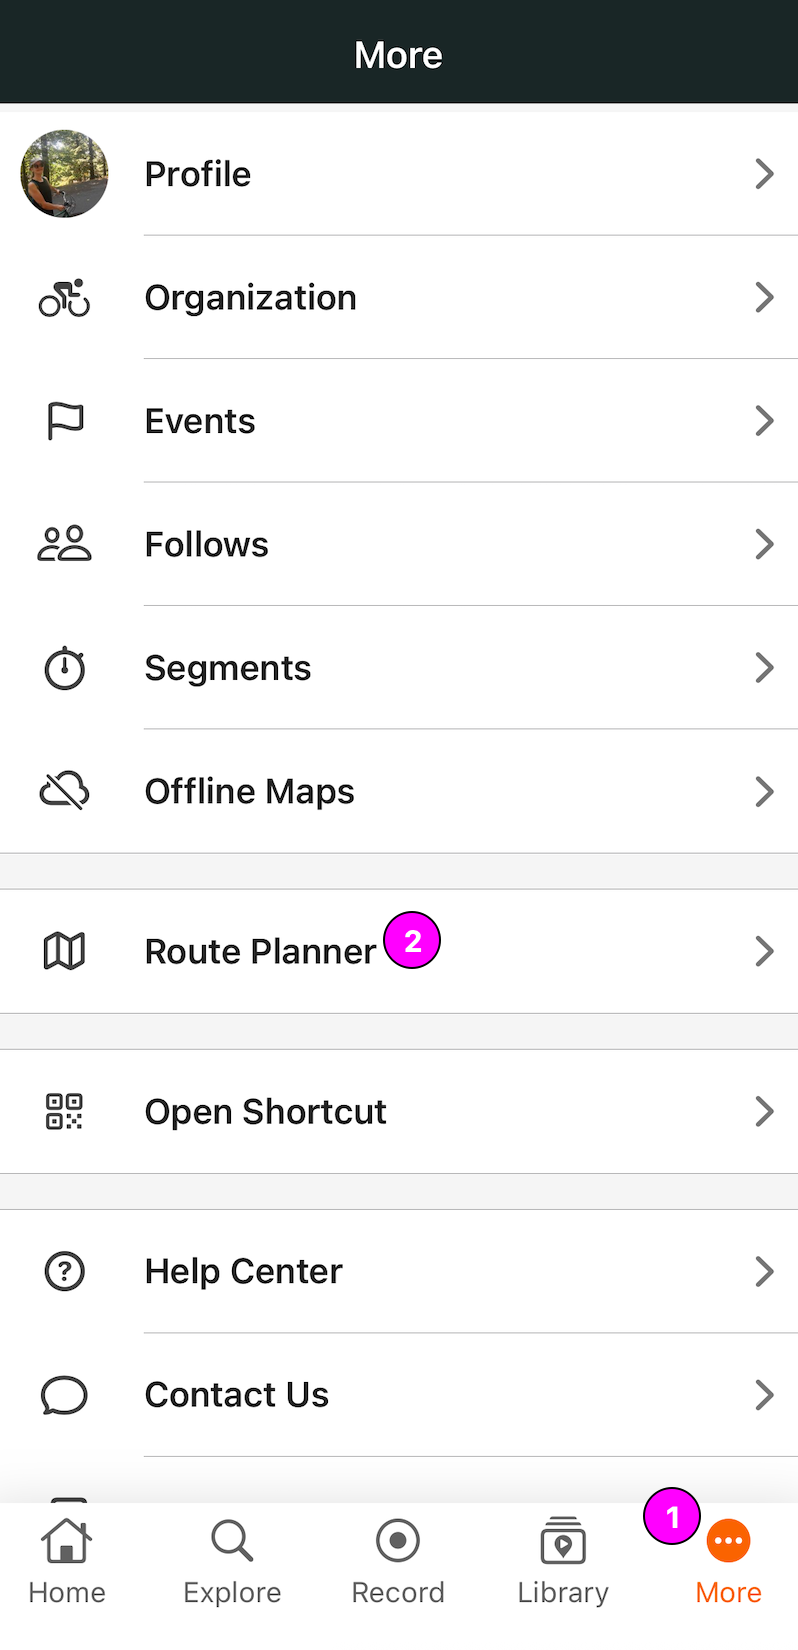
There are a few ways to access the Mobile Route Planner: from the Home screen, the More menu:
- Tap More while in the Ride with GPS app
- Tap Route Planner.
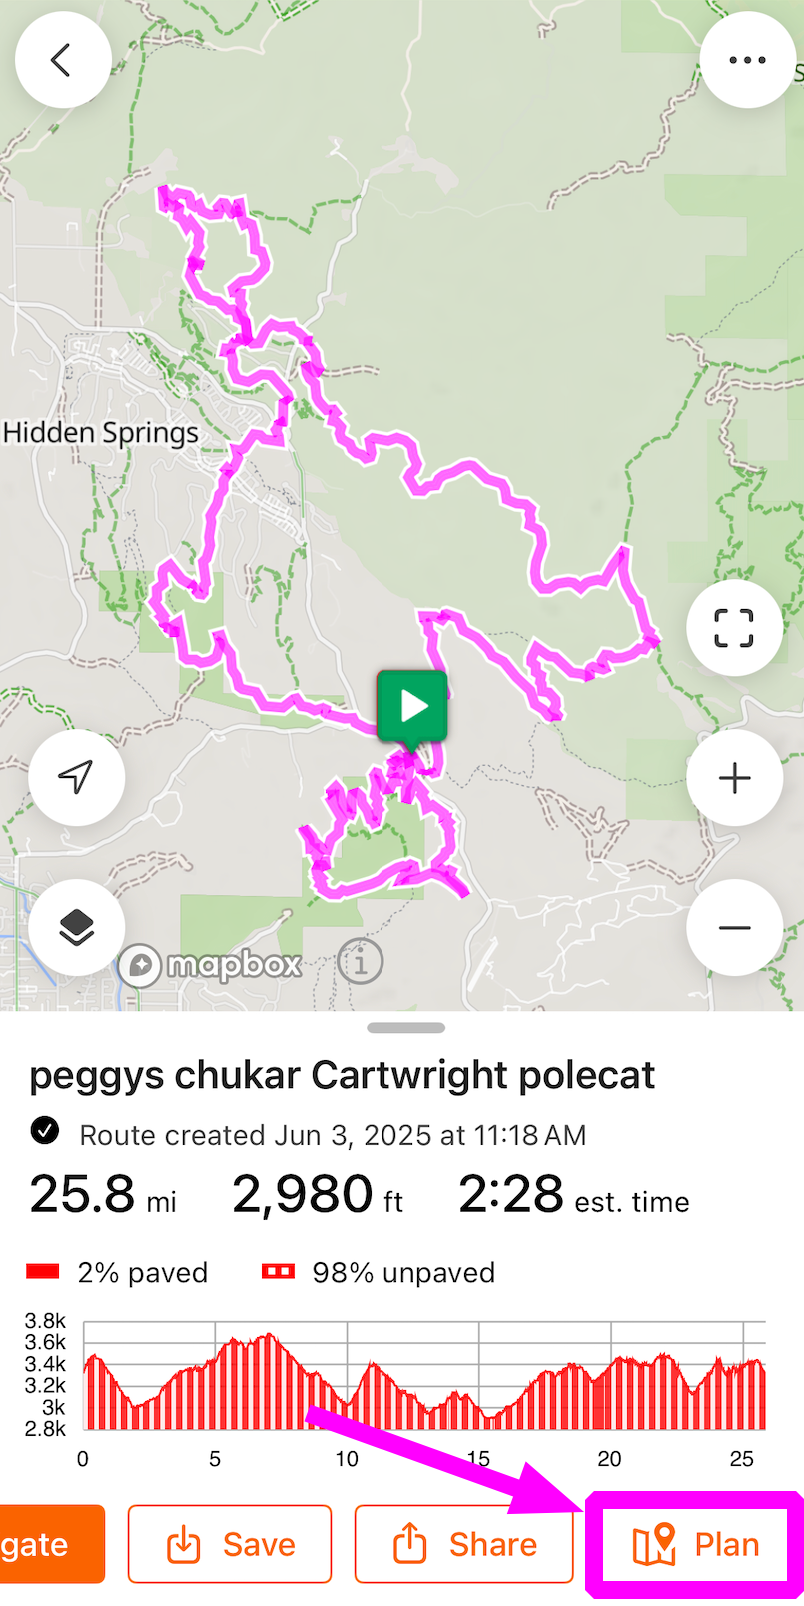
Or, if you already have an existing route or activity you want to work with, you can view the route or activity from your library, and tap Plan to open it within the route planner.
Choose a Start Point
- Jump to Home: If you've set your home location in your profile preferences, tap the Search box and then tap Home to jump to your set home location.
- Jump to Current Location: Tap Current Location to jump to your current GPS location.
Build out your Route
Route from Point A to Point B
- Once you've entered a start point, enter another address or point of interest into the search bar, then tap Route to Here to automatically create a route from point A to point B.
Choose your Route Track Manually
- Pan the map, and tap along roads or trails to add to your route manually.
- White Control Points will appear as you build your route, constraining your route between each point. Control Points ensure that the route will always pass through that location, even if the route line is changed. To delete a Control Point, tap it, then select Delete.
Move the Route Track
To move already established sections of your route:
- Tap directly on the route line to open an options menu.
- Select Move and drag the underlying map until the location pin lines up with the new route location.
- You'll see the route adjustment as a gray line. Tap Confirm to finalize the edit.
Undo & Redo
Additional Route Planner Tools
Additional route planning tools can be accessed within the Mobile Route Planner by tapping the Route Options icon in the upper right-hand corner of the Route Planner.
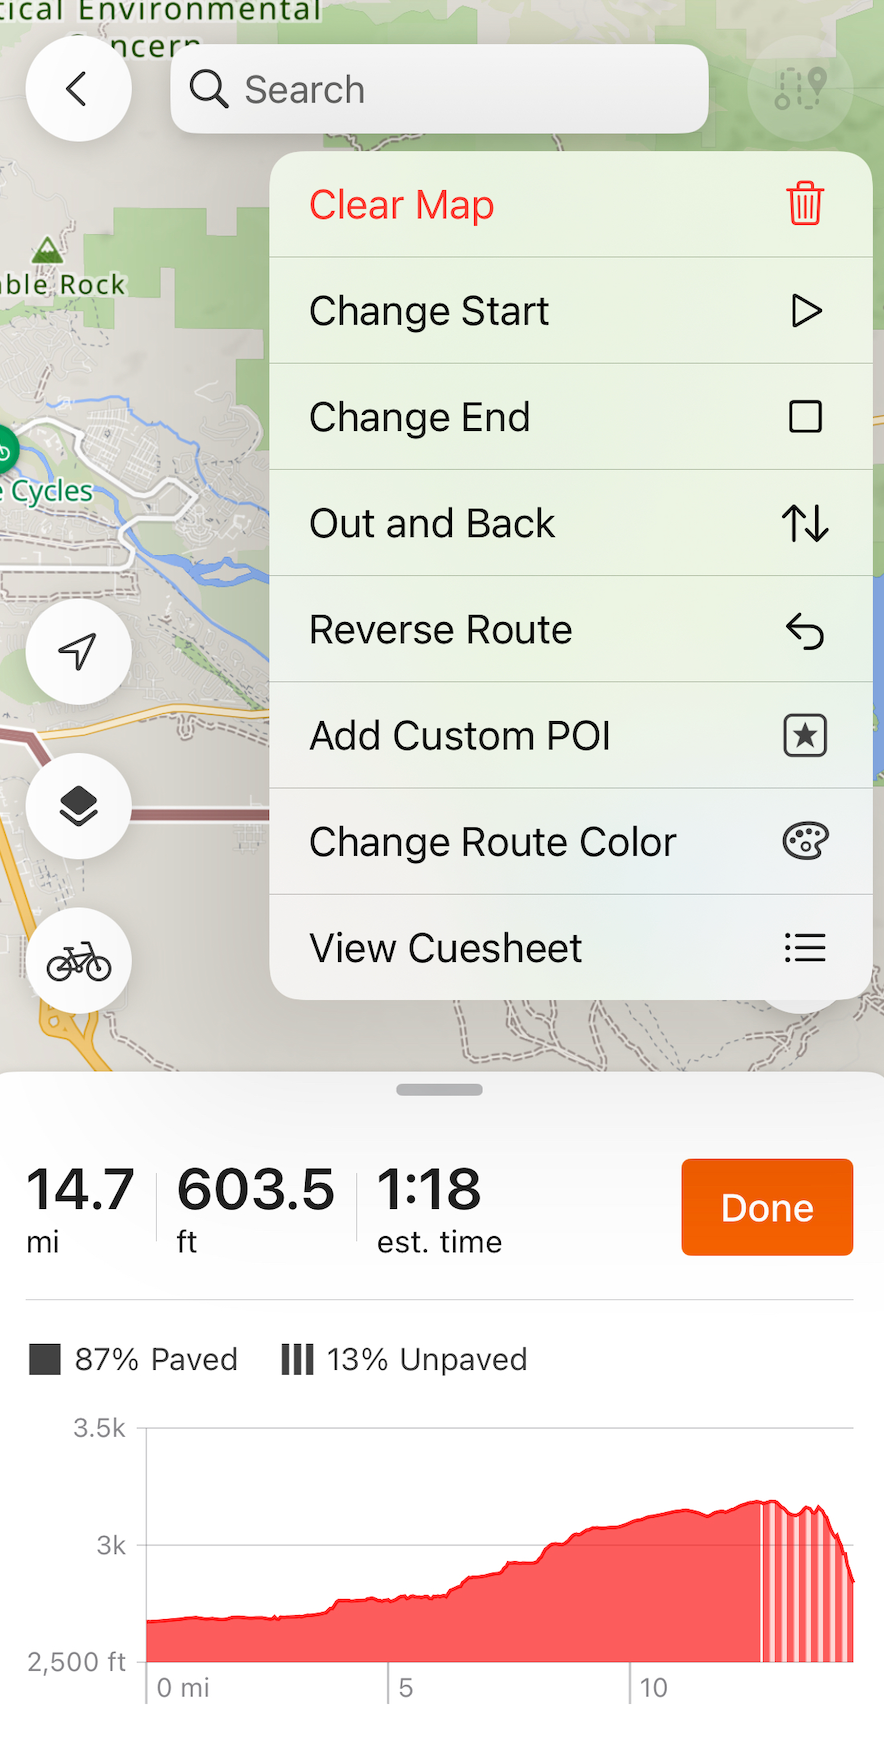 |
Change Start and End
Tap on the Change Start or Change End buttons to move the start or end points of your route, respectively. You'll be prompted to tap on the map or search for a location to select a new start/end point. Once you've selected your new start point, tap Next and then select the point where you want to connect to the existing route. Tap Done to update your route, or tap the Undo button to undo your changes.
Out and Back
Use the Out and Back tool if you're planning to navigate a complete route in both directions of travel. Simply tap Out and Back to automatically generate a second leg of your existing route that takes you right back to the start!
Reverse Route
The Reverse Route tool allows you to easily reverse an existing route. Please note that there may be slight changes to the resulting route, especially if the original route utilizes any one-way streets.
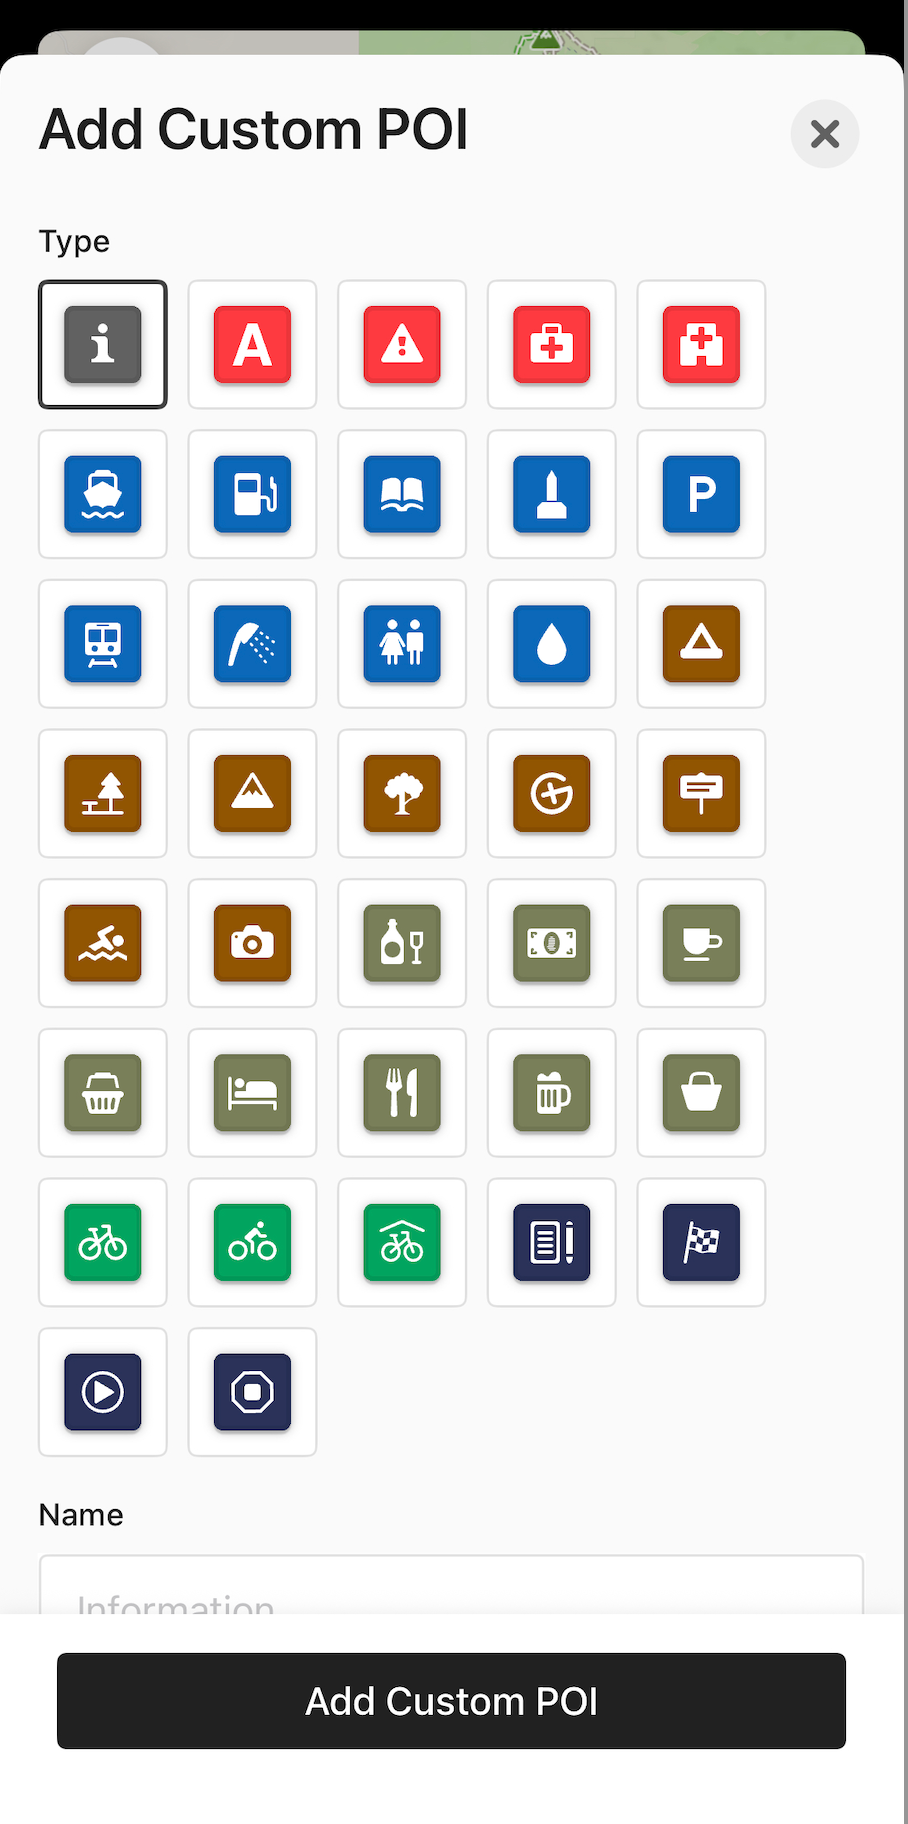
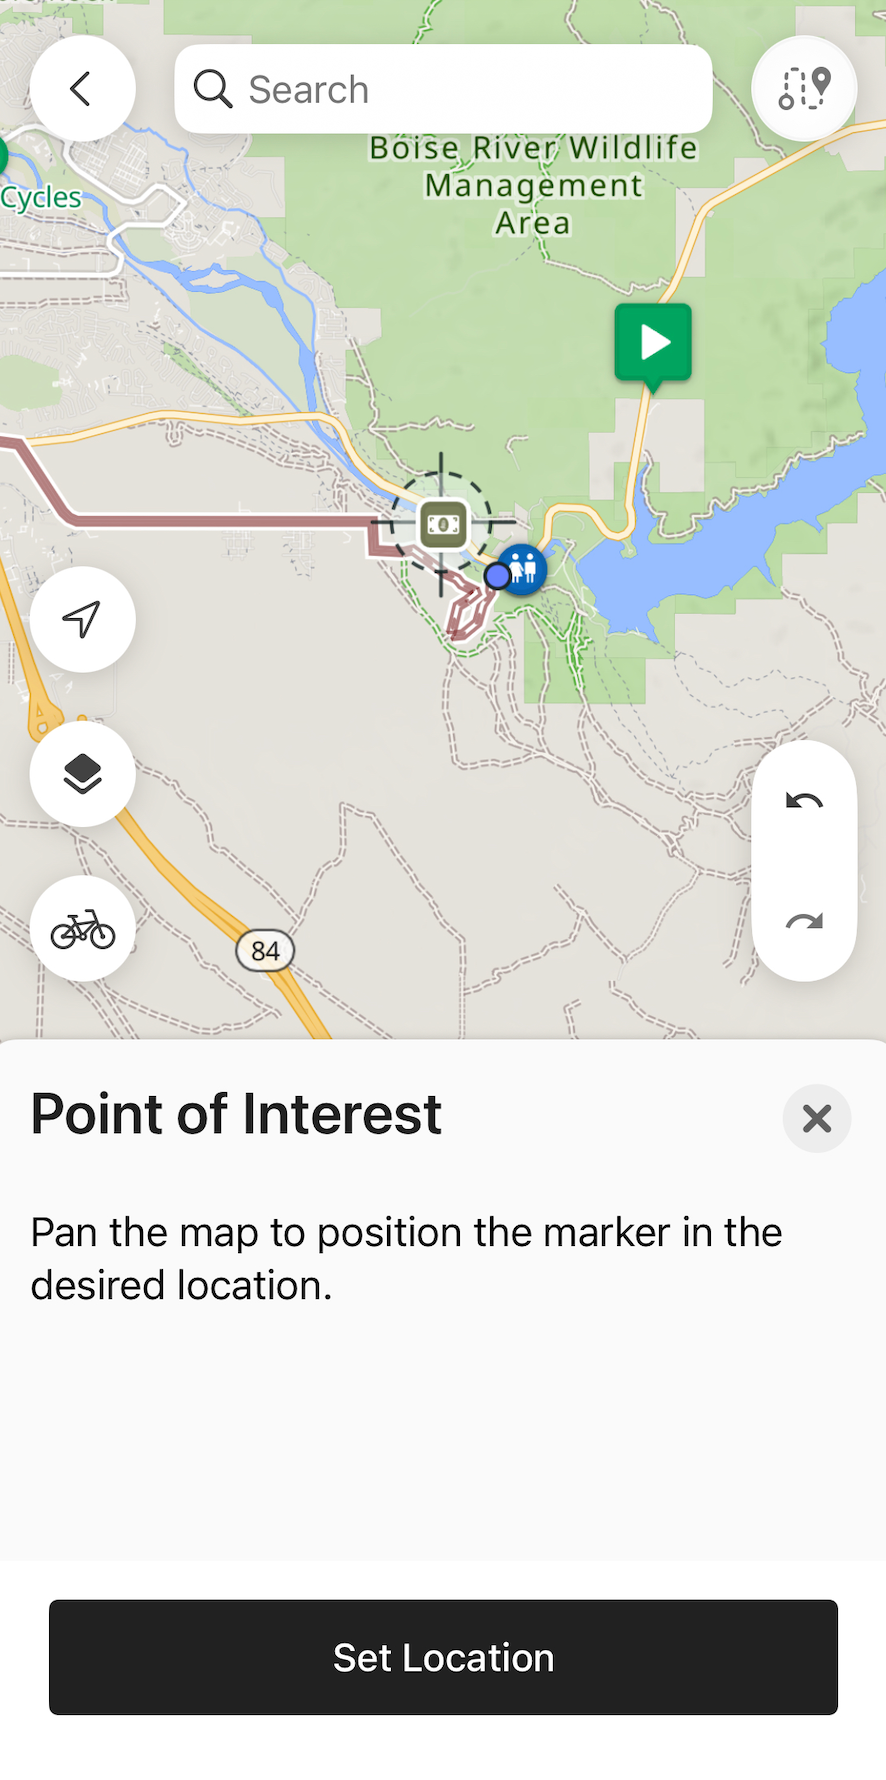
Add Custom POI
 |
 |
Add Waypoints
Waypoints act as a combination of a cue, POI, and control point. This means that they will be listed in your route's cuesheet, as well as appear on your route line similar to POI. They will be announced as cues when navigating with the Ride with GPS app, or shown on compatible head units when your route is synced. You can create a Waypoint from an existing POI, a Highlight, or by searching for a location.
To create a Waypoint from a Highlight or POI, simply tap on the Highlight or POI. From there, you can select Route to Here, Include in Route, or Start Route Here if you haven't started planning a route already.
- Include in Route will add the Waypoint to your route, and will change your route to include the Waypoint from the nearest point on your route line.
- Route to Here will add the POI as a Waypoint at the end of your route, and create a track line to the Waypoint at the end of the route.
- If you haven't yet started creating a route, you'll see the option to Start Route Here to add the Waypoint to the beginning of your route, and begin plotting a route.
You can also search for a location to add it to your route as a Waypoint. Simply use the search bar to search for a location. Tapping on a location from the returned results will create a new dropped pin with the options to Route to Here, Include in Route, or Start Route Here. For more detail about Waypoints, check out our Highlights, Points of Interest, and Waypoints article.
Change Route Color
To change the color of your route line after you've created it, tap a segment of your route between two control points and select Change Segment Color. From there, you'll be prompted to select a new color for that route segment.
View Cuesheet
When you create or make adjustments to a route, the cuesheet is automatically generated and updated. Tap View Cuesheet to view the current cues for your route.
- Scroll and tap on the cues to see their location on the route.
Clear Map
Tap the Clear Map button to remove your current work and get a clean map to create on. Caution: this action cannot be undone, so be sure to save your edits!
Map Options
Select a Routing Style
Select Walking, Cycling, or Driving as your routing style to adjust how the route planner chooses roads and trails. You can switch between routing styles during a planning session to adjust optimization or get around a route planner limitation. Just tap the bike icon in the bottom left-hand corner, and then select a different routing style from the pop-up menu.
Read about each routing style below:
- Cycling: Prioritizes safety for cycling. Routes will use multi-use and bike paths, but if this infrastructure isn’t available along your route, the route planner will use roads. Note: You may notice the route planner will not let you route along a certain stretch of road, instead diverting you to a side street. In some cases, this can result in funny loops and U-turns. If you notice this, we recommend switching to Driving mode for that portion of your route planning.
- Walking: Prioritizes safety for walking. This routing will not be limited by traffic laws such as one-way streets, and will route on multi-use and foot paths. This can be a good option for routing on gravel or trails.
- Driving: Prioritizes the shortest distance, typically sticking to paved roads or highways. Routes can’t be made using multi-use or bike paths with this style.
-
Draw Lines: Use Draw Lines to route through shorter areas that lack routable data. This could be a parking lot, an unmarked street, unmarked pedestrian cut-throughs, or new trails.
Draw Lines will not create cues and will override routing engine data, so please use this mode sparingly and switch back to another optimization after routing through the trouble spot.
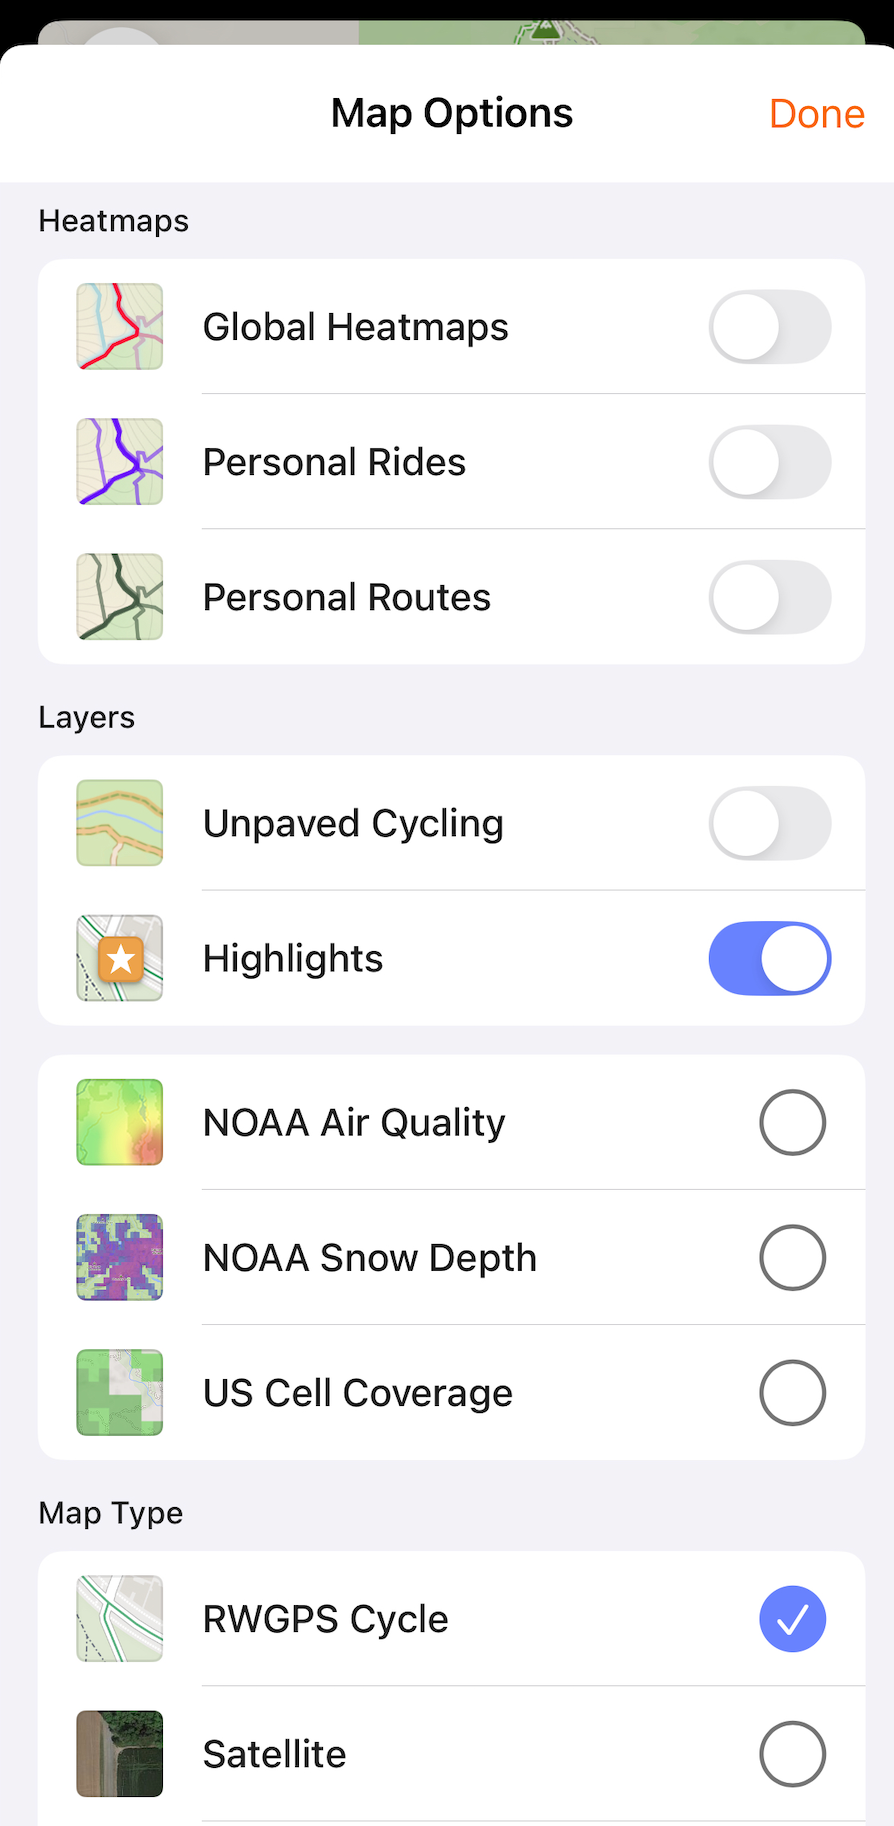
Change Map Type and Overlays
 |
-
Heatmaps
- Global Heatmaps show the RWGPS rider community's heatmap and view commonly ridden areas to help influence planning.
- Personal Heatmaps show your personal activity history as a heatmap to plan for new and old adventures.
- The Personal Routes heatmap shows your existing routes, so you can work with your past routes while planning a new one.
-
Layers
- Map Layers, like Unpaved Cycling and community-driven Highlights, can provide local information about your surroundings while planning a route or looking for your next great ride. The available Map Layers can also help you plan around current conditions on the ground, such as snowpack, cell coverage, or gnarly air quality
-
Map Type
- Choose a map type that fits your aesthetic and riding style. Changing the map type can also help you leverage different map data and routing prioritization. See Map Types for map keys and more details.
-
Overlays
- Tap to enable or disable a map overlay type. Select multiple overlay options at once.
Save your Route
- Tap Done at the bottom of your screen.
- Tap Save or select Navigate to navigate the route immediately without saving it first.
- Add route details such as a name, photos, and privacy settings.
- Tap Save to finish and add the route to your account.
Mobile Route Planner on iPad
Check out our dedicated route planning experience for iPads. Choose a start point by tapping anywhere on the map or select a specific start location using the Search bar. Additional route planning tools, such as Reverse Route and Add Custom POI, can be accessed by tapping the Route Tools dropdown list. Tap the map overlay icon to change your map type, enable heatmaps, or enable multiple map overlays while planning a route.
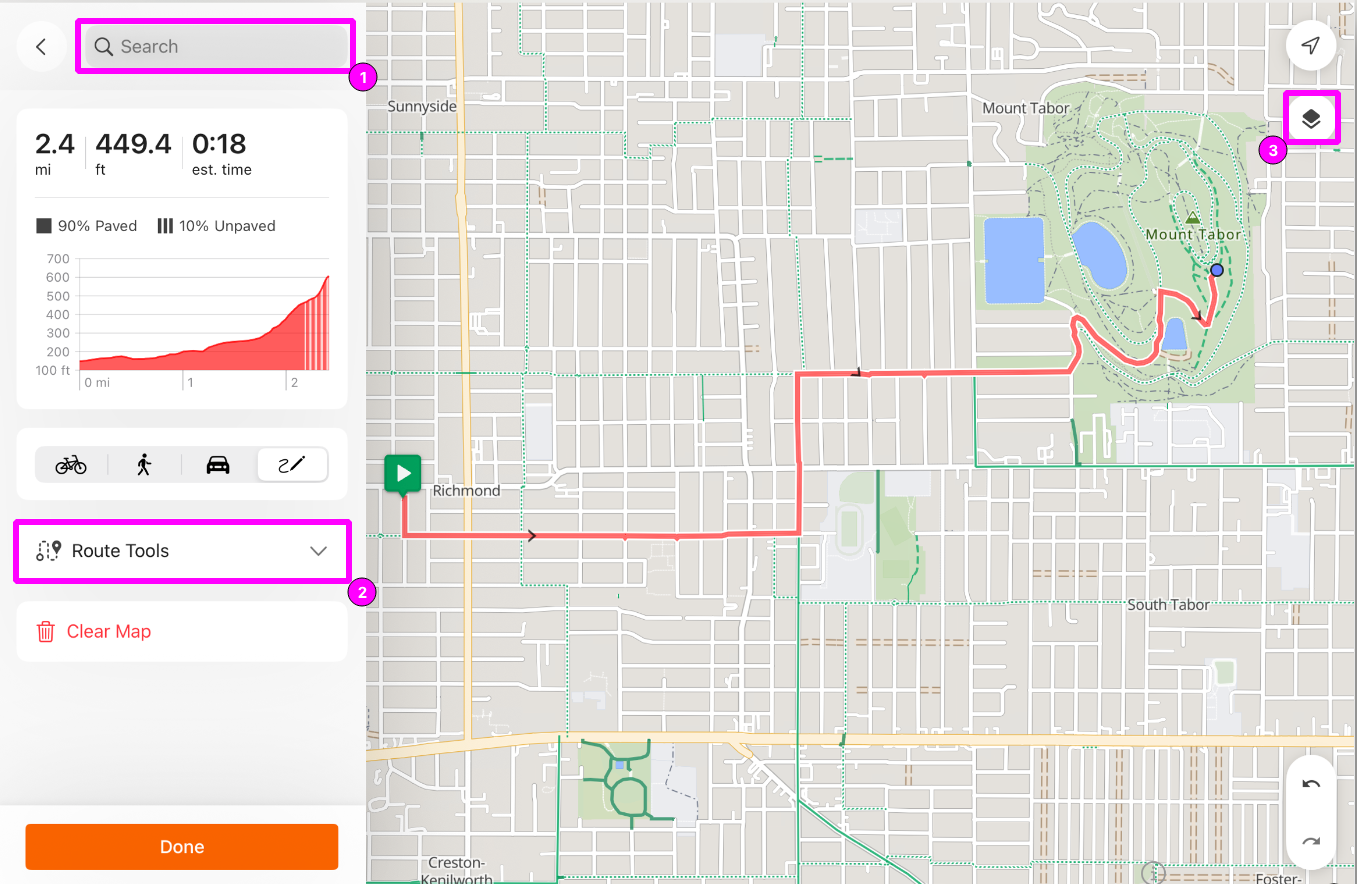
Pro-tip: Position your iPad in landscape for more screen real estate.
FAQ
-
The route planner keeps routing around the road I want to follow.
- Is it a one-way road or a road not safe for cyclists? Try switching your routing style to see if you're encountering a routing limitation. If that doesn't resolve the issue, try different Map Types to see if you're encountering a map limitation.
- Double-check to make sure the road you're routing on isn't closed seasonally or for construction.
-
There are more features available in the Web Route Planner.
- The Mobile Route Planner will perform many of the same tasks as the Web Route Planner, but not all. The Web Route Planner will provide the most robust route planning experience in Ride With GPS, and the Mobile Route Planner is a great way to supplement that when you're on the go!
-
The POI disappears when I add it to my route.
- Double-check that you have POI enabled as a visible map layer.
-
I can't open my route in the route planner/the route planner freezes when I open it.
- Generally, we recommend keeping routes under 500 miles/800 km for optimal app performance. If the route planner doesn't load your route properly, double-check that it doesn't drastically exceed this suggested distance limit.
Related to